How To Build an ADU: The Definitive Guide
Building an ADU is not just about creating a new space; it's about enhancing your property's value, increasing its functionality, and improving your quality of life.

Elevate your property's worth by constructing an ADU!

Fernanda Castillo
Embarking on the journey of building an Accessory Dwelling Unit (ADU) is an exciting venture filled with potential and possibilities. Whether you're considering an ADU as a source of rental income, a cozy guest space, or a multigenerational living solution, this comprehensive guide on how to build an ADU in California is your roadmap to success.
Book a Free Consultation to see how you could benefit!
What is an Accessory Dwelling Unit?
ADUs, also known as Granny Flats, backyard cottages, or in-law units, are secondary units that are located within the same property as the primary residence. Their main goal is to serve as extra living spaces, and they typically include their own kitchens, bathrooms, and bedrooms. They serve various purposes, including guest houses, short and long-term rentals, home offices, and more.
ADUs have become increasingly popular due to housing shortages and their many advantages. For example, in California, as they have proven to be a practical solution to the housing crisis, several government programs were initiated to boost ADU construction statewide, including the ADU Grant Program (now completed) and the SDHC ADU Finance Program, among others.
Which Type of ADU Should I Choose?
Selecting the right type of ADU for your project is a crucial decision. Not only does it influence the design and functionality of the unit, but it can also impact the construction process. While you don't need prior building expertise to make this choice, it's essential to understand the differences between ADU types before proceeding.
ADUs come in various forms and sizes, each offering unique features and benefits. Whether you're looking to create a cozy space for guests or to generate rental income, there's an ADU type that suits your needs. Let's dive into the ADU types and discover which one aligns best with your goals and property layout.
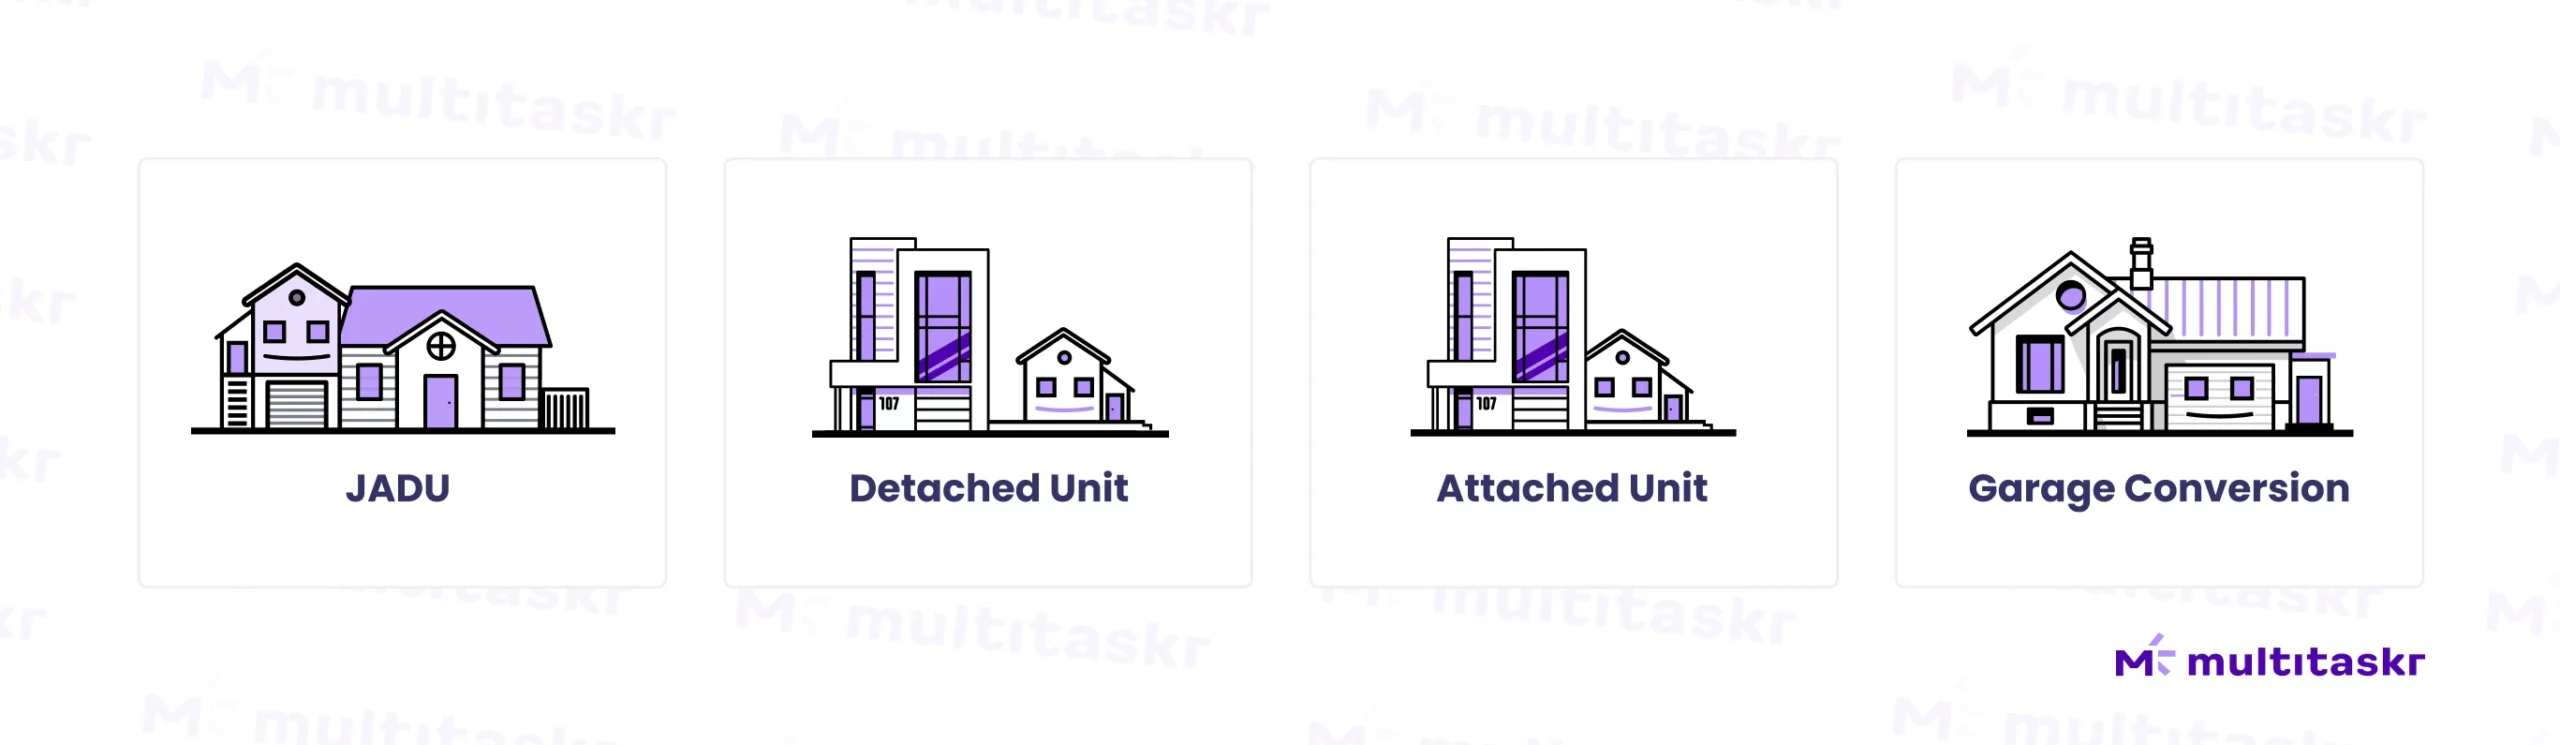
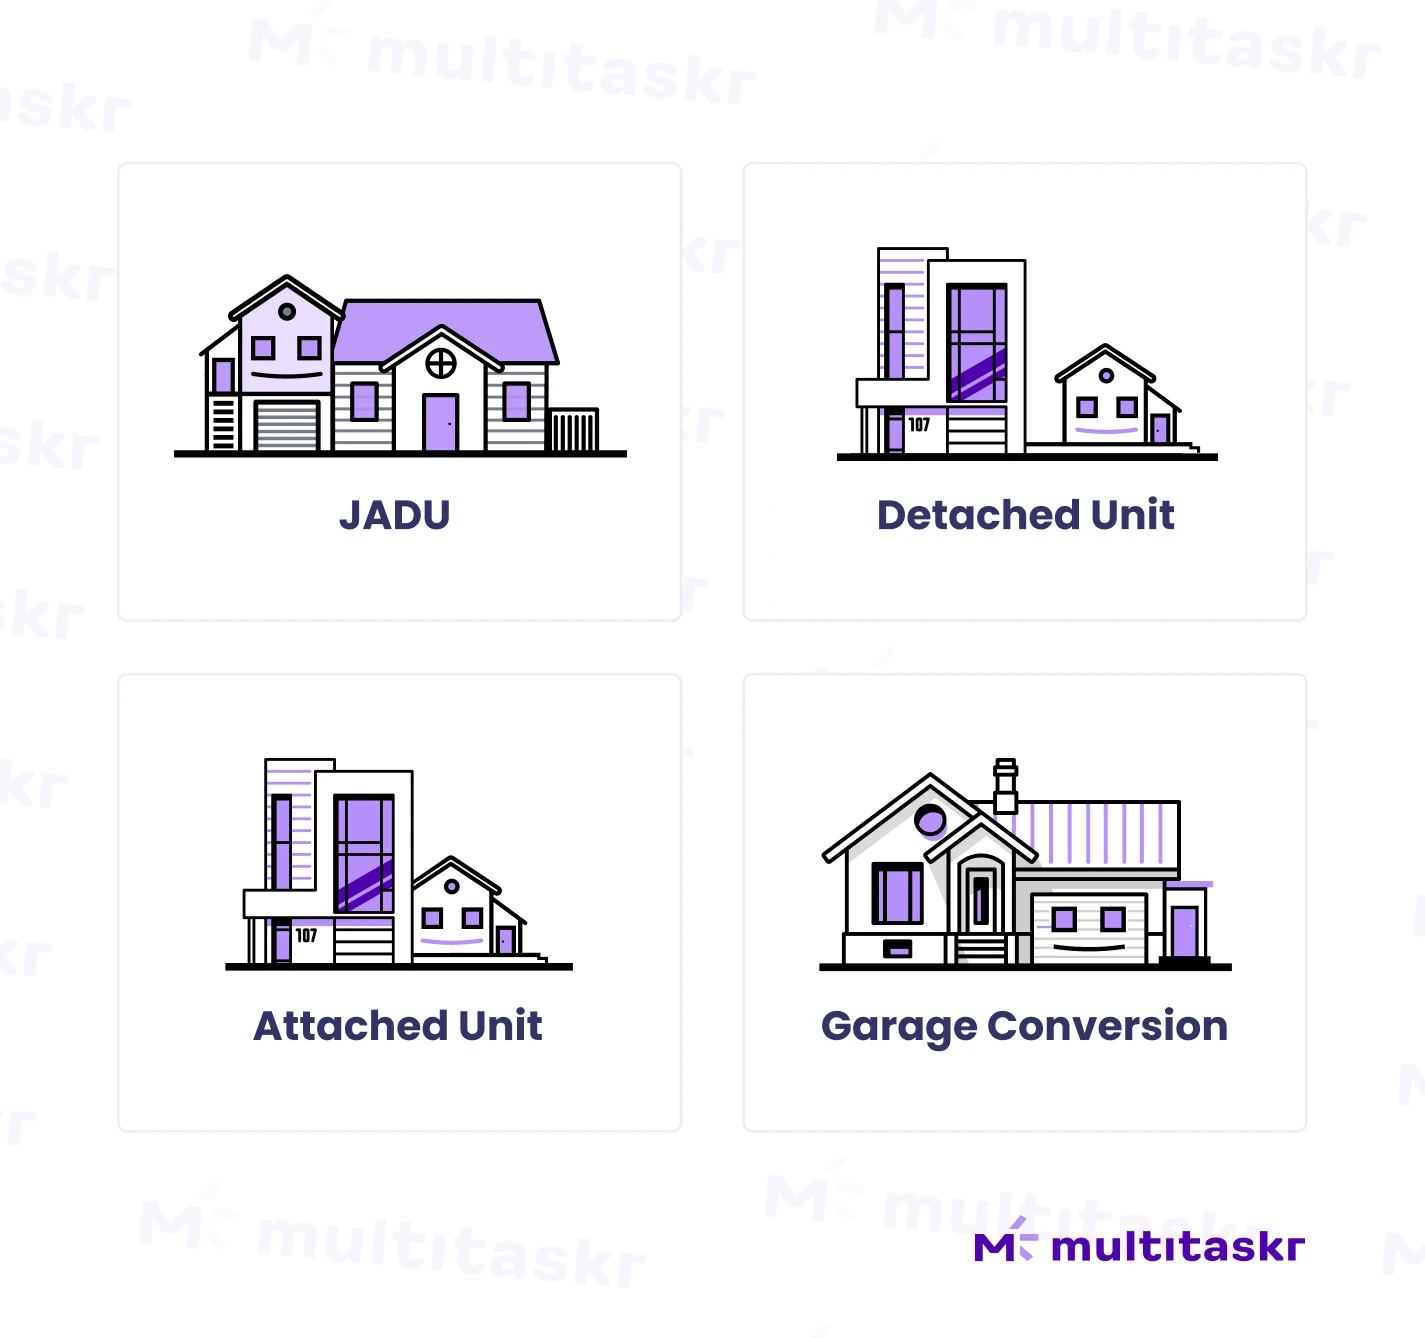
Detached
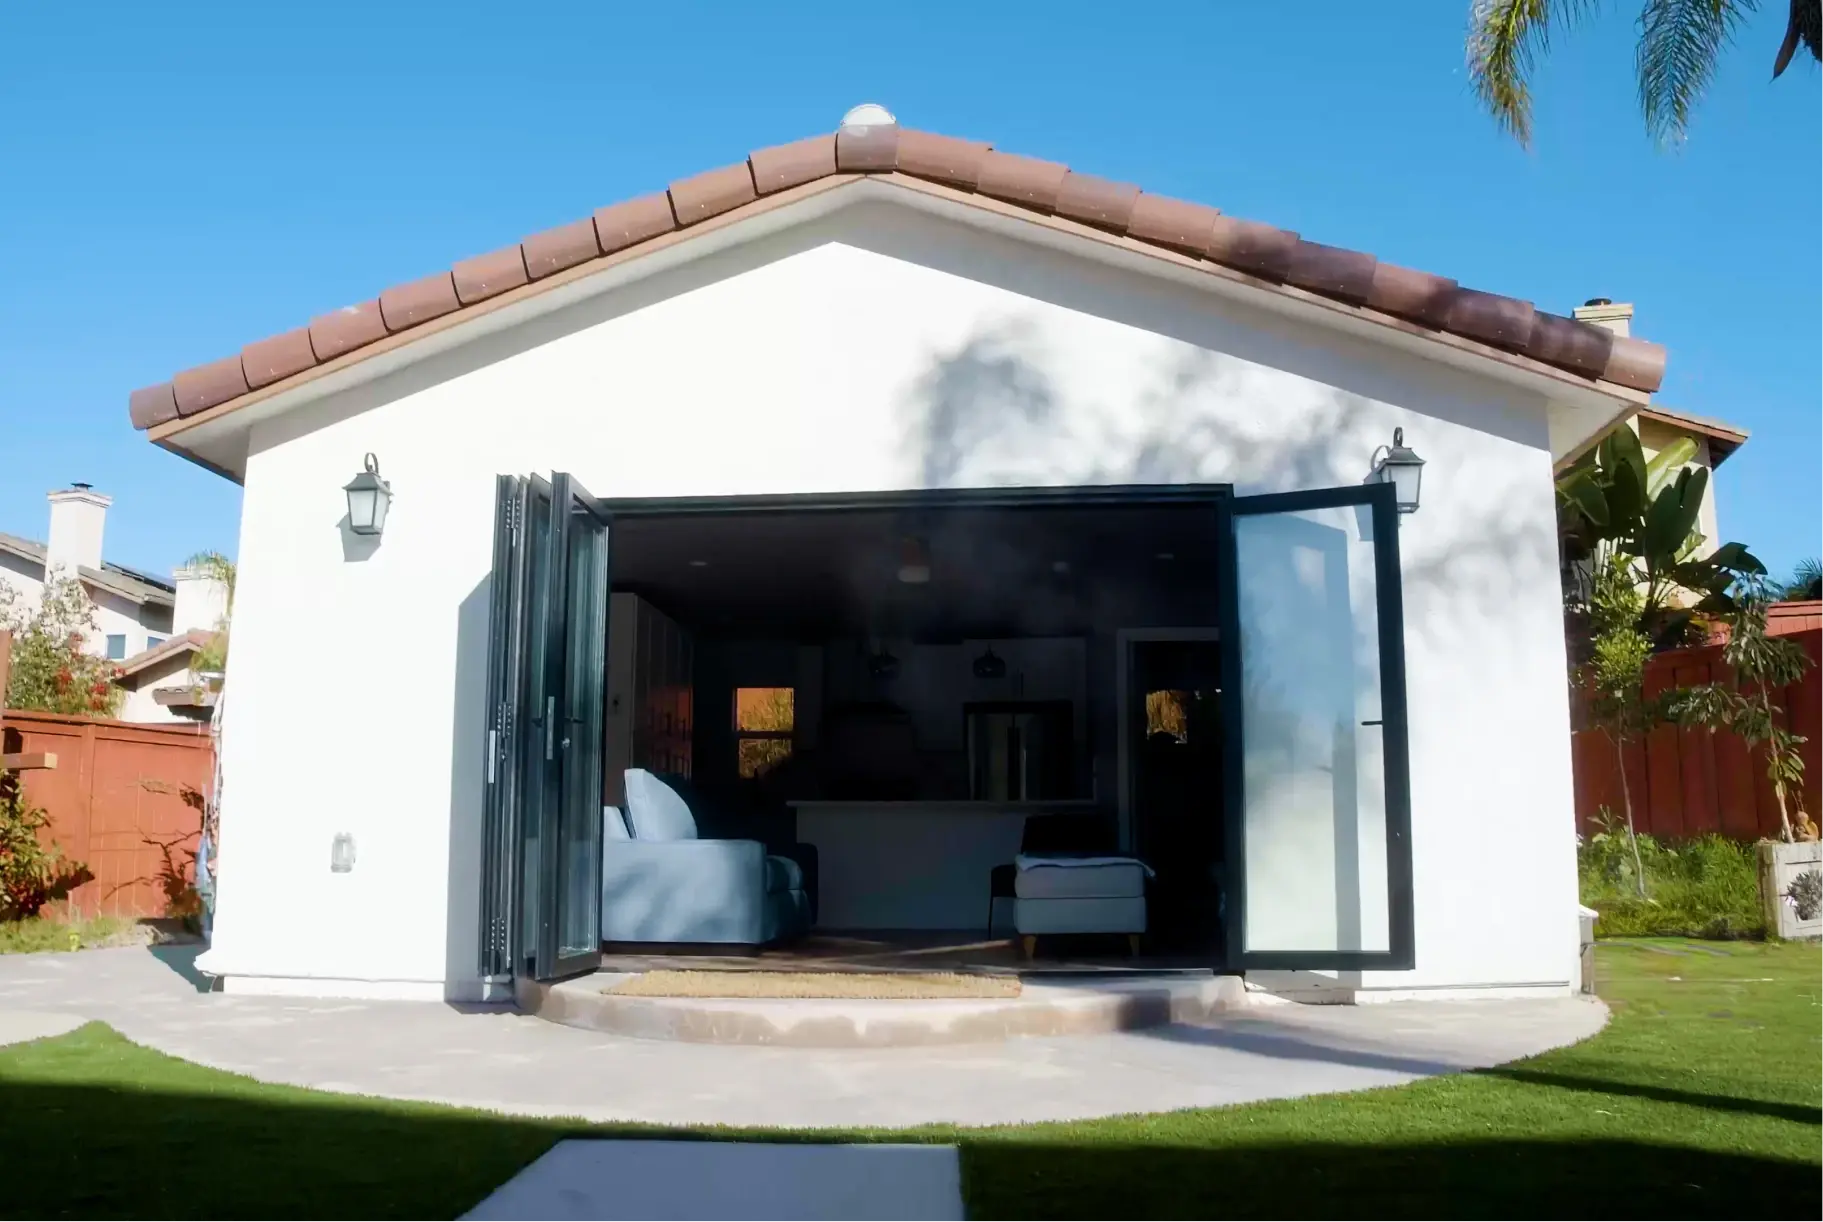
Detached ADUs are standalone structures separated from the main residence, offering complete privacy and independence. These units are perfect for homeowners looking to maximize rental income, host long-term guests, or create a tranquil retreat on their property.
The size limit for this type of ADU can vary depending on local zoning regulations, building codes, and specific ordinances set by your city or municipality. In some areas, there may be no particular size limits for detached ADUs, which allows for more flexibility in their design and construction. For example, a Detached ADU can be up to 1,200 sq ft in South California.
Attached
Attached ADUs are integrated into the primary dwelling, meaning they share at least one common wall with the main house. This type of ADU is ideal for homeowners seeking additional living space without significantly expanding their property's footprint.
ADU Garage Conversion
Garage Conversions turn an existing garage into a fully functional living space. These units are cost-effective for utilizing underutilized space and are particularly popular for short-term rentals. Doing a Garage Conversion instead of a regular detached or attached ADU is usually cheaper and faster!
JADU or Junior Accessory Dwelling Unit
A JADU is a unit that is no more than 500 sq ft and contained entirely within a single-family residence. These smaller ADUs have their own entrances and are equipped with basic amenities like a kitchenette and bathroom. JADUs are an excellent choice for homeowners who want to maintain proximity to family members while still enjoying some independence. They can also be used as rental units for extra income.
How to Build an ADU in California: 5-Steps to Successful Building
1. Find A Contractor
The first step to start building is finding a contractor. Hiring a seasoned ADU contractor is crucial as it offers many benefits for your Accessory Dwelling Unit (ADU) project, such as bringing the expertise needed to navigate the complex regulations that must be followed.
Working with a contractor also helps avoid unexpected expenses, as they optimize your budget and guarantee the completion of your project through a pre-established timeline. Ultimately, contracting professionals offer peace of mind, reducing stress and uncertainty in ADU construction. That's why you must ensure you hire the right person for the job who meets your needs and budget!
Alternatively, you have the option of considering a construction company that specializes in ADUs. These companies provide comprehensive solutions, streamlining the process while maintaining a focus on quality. Construction companies typically possess extensive experience in managing all facets of ADU projects, from the initial design and permitting to the actual construction and final finishing touches.
If you're in search of a seamless ADU construction process, Multitaskr is here to support you every step of the way.
It's essential to remember that whether you opt for an individual contractor or a full-service construction company, you have a variety of choices to turn your ADU project into a reality!
How much will it cost to build an ADU?
The price of your ADU may vary depending on many factors, like size, type of ADU, location, etc. You might also need to consider the complexity of the unit if built from scratch and the local material and labor costs.
After all these considerations, building an ADU in California may range from $50,000 to $300,000 on average.
How long will it take to build an Accessory Dwelling Unit?
This is a tricky question, as you'll probably be able to find information claiming that an ADU can be constructed in four to six months, but that's only partially true! While construction itself can take up to six months, there's a whole process behind it that adds up to your project's final timeline. A realistic period will be from 13 to 18 months if we sum up the time it takes the project to go through all the other stages, which are financing, design, and permitting.
Remember that it's only an estimate, as every project is different, and it might vary due to other factors like changes requested down the line and processes like inspections.
2. Make a Feasibility Study
The next step you need to take in your journey is doing a Feasibility Study, as it's one of the most critical steps when building an ADU. There are also a lot of benefits that come with performing one of these studies for your unit, like:
- Knowing if your ADU is feasible in terms of cost and time
- Understand if the project complies with city zoning regulations
- Mitigate unforeseen costs
- Anticipate construction-related restrictions
- Make informed decisions about your project
Zoning & Regulations Feasibility
Now that we know how vital a feasibility study is, let's dive into the zoning and regulations that must be met when constructing an ADU.
Local governments establish zoning ordinances and building codes to regulate land use and development within their jurisdictions, meaning that what may be permitted in a city or county doesn't necessarily mean all regulations are the same. Here's a breakdown of key aspects related to ADU zoning and regulations:
- Zoning Classification: ADUs are subject to zoning regulations that dictate where they can be built, and these codes typically establish specific zones where ADUs are permitted. Standard terms include R-1 (Residential) or R-2 (Multi-Family Residential).
- Size: ADUs sizes can vary depending on the type, but they range from 300 to 1,200 sq ft on average.
- Setbacks: By law, when building an ADU, specific space requirements exist. The setback should be between 0 to 4 feet from the lot line for the sides and rear of your property. However, your city's code determines the regulations for setbacks at the front and along the street.
- Building Height: Zoning codes commonly define the maximum height allowed for ADUs, including the main structure and any additional stories or levels.
- Historic Districts: If your property is in a landmark district, additional regulations may be applied to preserve the area's historic character.
- Use and Occupancy: Zoning regulations can specify how ADUs can be used. They may allow ADUs for family members, short-term or long-term rentals, or other uses. Compliance with these use restrictions is crucial to avoid legal issues.
- Permitting Process: ADU projects often require permits and approvals from local government authorities. This process includes submitting detailed plans, undergoing inspections, and paying permit fees.
Interested in knowing if your project is possible? We're here to help! Our complete PFA (Preliminary Feasibility Study) will determine your ADU project's feasibility, including the potential costs, time frames, and return on investment.
Financial Feasibility
How to finance an ADU?
Financing your project can be one of the most challenging tasks when bringing your vision to life, and navigating the many options available can be overwhelming. Still, with careful planning and the right financial strategy, you can turn your ADU dreams into a reality without breaking the bank.
In this section, we'll explore the feasibility of ADU financing and provide insights into how you can finance your ADU!
Savings and Personal Funds:
If you have personal funds saved, financing your project becomes much more feasible! By using your own money, you won't need to get a loan or external financing, reducing the potential costs in the long term.
Home Equity Loans or HELOCs (Home Equity Lines of Credit):
ADU financing through a HELOC can be viable if you have substantial equity in your primary residence.
ADU Construction Loans:
These specialized loans are designed explicitly for financing ADU construction. They may have more flexible terms and lower down payment requirements than traditional mortgages, making them a suitable choice.
Cash-Out Refinancing:
Another option for funding your ADU is through cash-out refinancing, which allows you to refinance your mortgage for more than you currently owe and receive the difference in cash; this option is great if you have considerable equity in your home!
ADU Grants and Incentive Programs:
Some governments create grant programs or give incentives to homeowners who want to build an ADU to encourage the construction of affordable housing. Find out if there is a program available for you by visiting your city's portal!
Personal Loans or Lines of Credit:
Banks and credit unions offer personal loans or lines of credit as a means of financing for ADUs. It's crucial to note that interest rates may be higher than other financing options.
ADU Lenders:
Certain financial institutions focus on providing financing for Accessory Dwelling Unit construction and offer customized solutions. These lenders may offer favorable rates and terms when compared to other options.
3. Design For Your Needs
Floor Plans:
A floor plan is basically a drawing of a room or space viewed from above. It shows us the project's layout, from the rooms, walls, doors, and windows to other architectural features. Floor plans are an essential part of ADU construction, as they provide a detailed representation of the spatial arrangement, which helps us understand the flow of the structure.
That's why your ADU's floor plan is the foundation of your future space. Investing time and consideration into your floor plan can lead to a well-designed ADU that not only meets your current needs but also holds long-term value. No matter the reason, whether you're aiming for rental income or personal use, a well-crafted floor plan is your key to success.
Remember that while you can DIY your floor plans, consulting with a professional is vital to avoid future setbacks. You may also find free ADU floor plans in your city's portal, so make sure to check out their websites.
Interior and Exterior Design:
Designing your Accessory Dwelling Unit can be an exciting step in the construction process. It's not only about the functionality of the project, but also about creating a visually appealing space while optimizing the entire area.
In this section, we'll explore the many things you need to consider while designing the interior and exterior of your unit.
Interior:
- Think about space optimization when designing, as ADUs usually are limited in size.
- Consider open-concept layouts while both designing and creating the floor plan of your ADU.
- Consider using versatile furniture and smart storage solutions or appliances.
- Design an interior that meets the needs of the occupants.
- Choose a design style that complements your main house while reflecting your taste, whether it's modern and minimalistic or cozy and traditional.
- When designing a space, it is essential to consider the placement of windows to maximize natural lighting carefully.
- Select durable materials for flooring, countertops, and fixtures.
- Think about energy-efficient appliances and lighting to reduce long-term operational costs.
Exterior:
- Creating a cohesive look between the main house and the ADU is vital. Match materials, colors, etc.
- For landscaping, consider adding greenery to your design to make your exterior inviting.
- Accessibility is crucial, so ensure that the ADU's exterior is easy to navigate with well-designed entryways, ramps, and pathways.
- Privacy is also a factor to consider! Plan for privacy both for the ADU's occupants and the main house.
- Ensure your exterior design complies with local regulations, including size, height, and distance from property lines.
Note: Collaborating with a professional architect or designer can bring your vision to life while ensuring compliance with local regulations!
4. Obtain your permits
Obtaining the necessary permits is crucial when venturing into constructing a Granny Flat. Permits are official approvals from your local building department that indicate your project's compliance with building codes and zoning regulations, among others. Once your permits are in order and approved, you have legal authorization to start building!
How much does an ADU permit cost?
The cost of an ADU permit is subject to many factors. It mainly depends on your property's location, the size of the ADU, and the requirements set by your local building department.
Permit fees are typically based on the total construction cost. However, some areas charge a fixed fee while others charge a percentage of the final cost.
To give you an idea of how much you can pay for ADU permits, we can look at the city of San Diego's example: For a 400 sq ft ADU, you would roughly pay around $9,000 dollars, which includes the ADU permits, Construction and Demolition (C&D) Debris Recycling, and Water Fees, to name a few.
How long does it take to get an ADU permit?
The time it takes to obtain an ADU permit can also fluctuate significantly, depending on factors like your local building department workload, specific mandates, the review process, etc. For some cities, it might only take a few weeks, while it might prolong to several months in others.
Following the example mentioned above, ADU permits in San Diego can take up to 6 to 8 months.
If your permits are taking longer than expected to be approved, don't stress! The process can be complicated and time-consuming, so working with a professional with experience navigating this phase of your project is essential. If you plan on building on your own, consider seeking assistance when the time comes.
5. Start building
As you've navigated through the earlier stages of your Accessory Dwelling Unit, you're now on the verge of the most exciting phase – construction! Building your ADU is where your vision truly comes to life, and this guide is your trusted companion for mastering every aspect of the construction process. From site preparation to the final finishing touches, we'll walk you through every construction stage to ensure your ADU project unfolds smoothly and successfully.
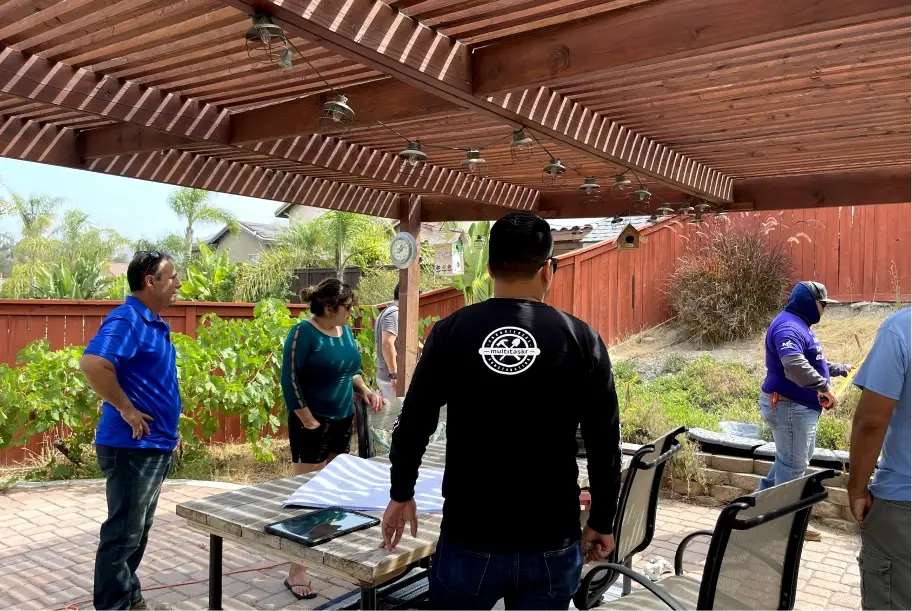
- Pre-Construction Meeting and Site Visit:
The pre-construction meeting and site visit mark the kickoff of your ADU construction journey. During this phase, your project team, which may include contractors, designers, and often city officials, gathers to discuss project specifics and inspect the construction site. This critical step lays the foundation for a successful construction process, ensuring everyone is on the same page, and the project is on the right path.
- Underground Utilities:
This phase involves installing essential services like water, sewage, and electrical lines beneath the ground at your ADU construction site. This step is critical as it ensures that your ADU will have access to vital utilities. Proper installation and coordination during this phase are essential to avoid future issues and ensure the seamless operation of these utilities.
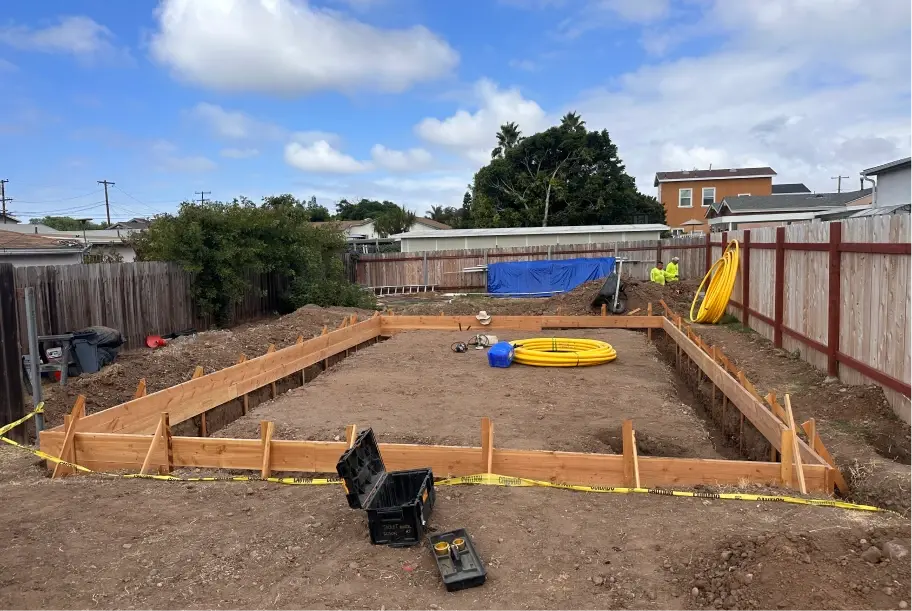
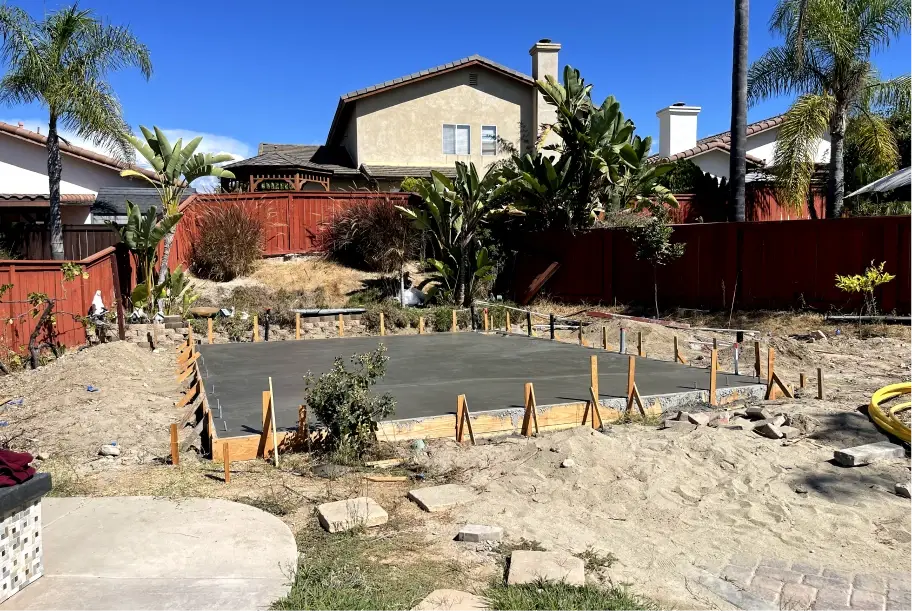
- Foundation:
The foundation phase is the basis of your ADU construction. It's where the groundwork is laid, both literally and figuratively. During this stage, the foundation is built, which serves as the structural base for your ADU. The foundation must be constructed meticulously to ensure your entire ADU structure's stability, durability, and safety. This phase involves excavating, forming, and pouring concrete to create the foundation for your new living space.
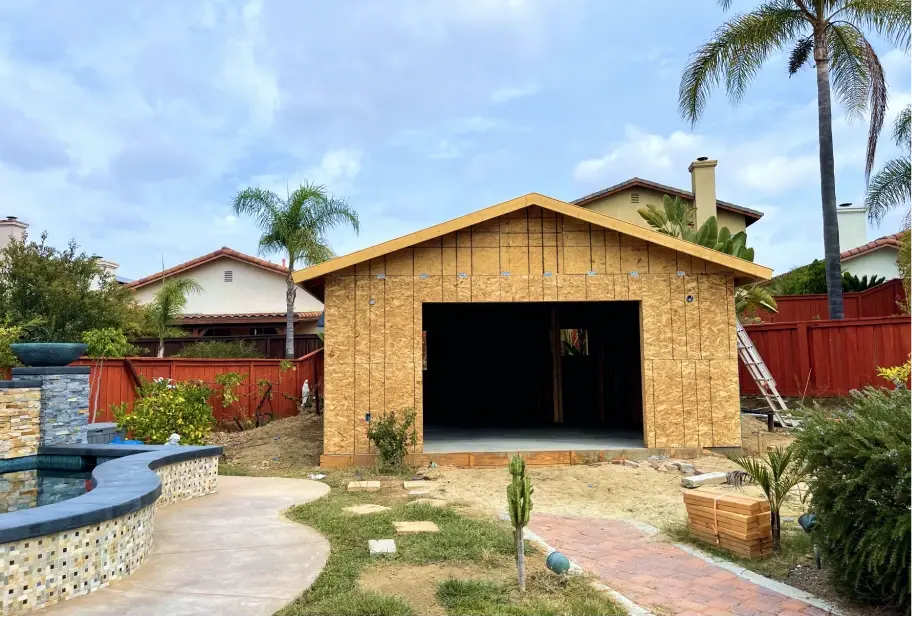
- Framing:
This is where your project truly takes shape, as the framing is pretty much the skeleton of your new living space. During this stage, the walls, floors, and roof are built to provide the basic structure for your ADU, ensuring it's sturdy enough to support all the components that will come next.
- MEPs:
The MEP (Mechanical, Electrical, and Plumbing) phase is essential in ADU construction. It involves installing heating, ventilation, and air conditioning systems for climate control, setting up electrical wiring and lighting, and establishing plumbing for water supply, drainage, and sewage. This phase ensures your ADU is functional and comfortable, meeting modern standards for a livable space.
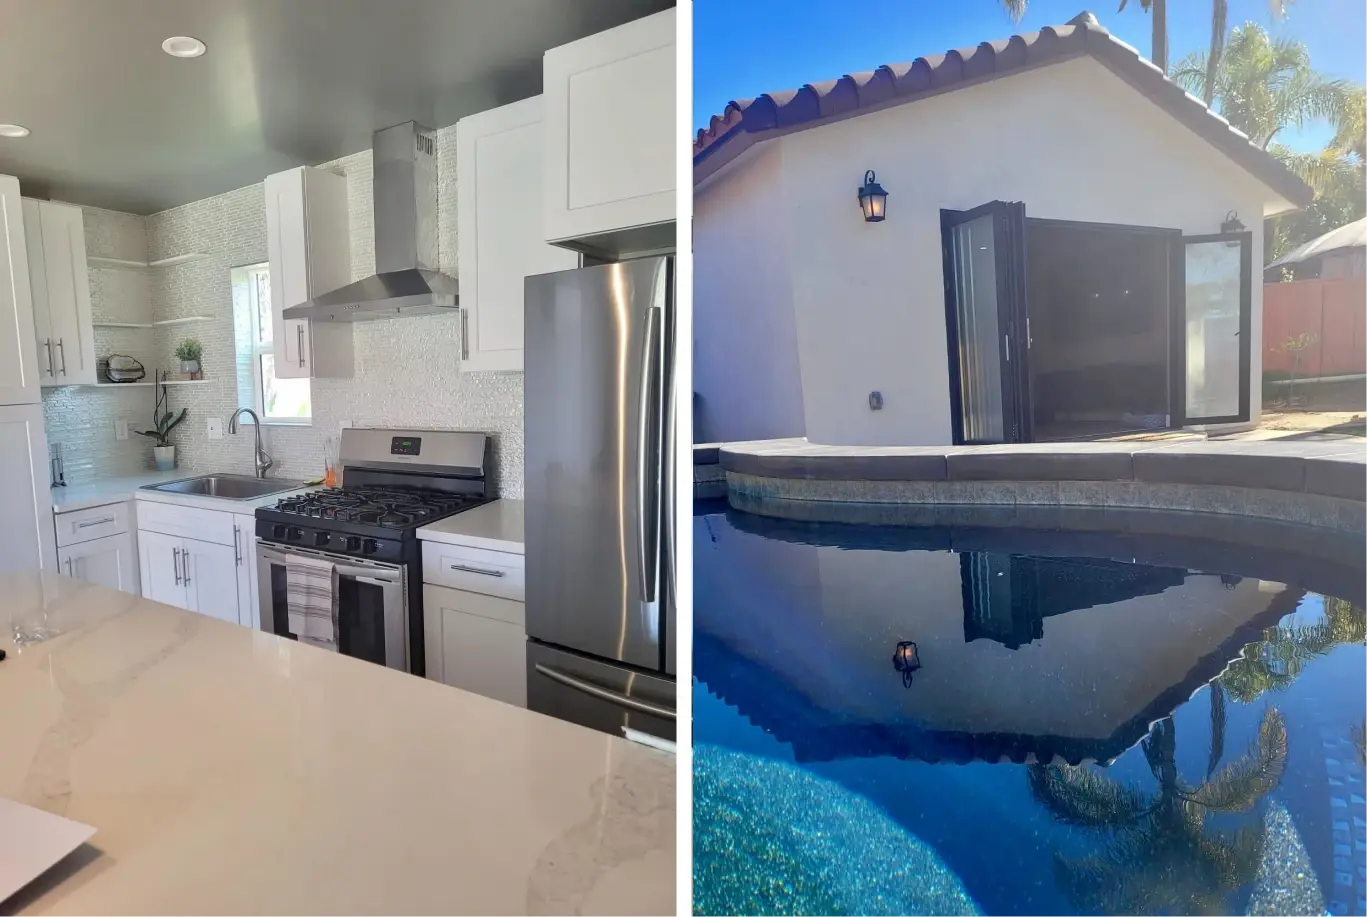
- Interior & Exterior Finishes:
The Interior and exterior finishes phase brings your ADU to life. It includes adding final aesthetic touches like indoor flooring, painting, fixtures, and appliances, creating a comfortable and appealing interior. For the exterior, this phase involves, for example, landscaping or hardscaping to enhance your ADU's visual identity and functionality.
- Final inspection:
During the Final Inspection phase, local authorities conduct thorough assessments to verify your ADU's compliance with safety codes, zoning regulations, and quality standards. Successful inspections indicate readiness for occupancy and adherence to all legal requirements, marking the completion of your Accessory Dwelling Unit!
In conclusion, now that you have a comprehensive understanding of how to navigate the entire ADU construction process in California, you're well-equipped to launch your project confidently! We hope this complete guide has addressed all your questions regarding Accessory Dwelling Units and the intricate steps required to bring your vision to fruition.
If you're seeking support throughout your ADU journey, don't hesitate to reach out; our doors at Multitaskr are always open! Our team is readily available to assist you every step of the way. Schedule a free consultation with one of our experts to kickstart your ADU project and turn your dreams into reality!
Book a Free Consultation to see how you could benefit!